
The Yocto Project’s build system makes building your own Linux embedded system easy using “layers”. Thanks to the guys at the BMW Car IT group, Robot Operating System (ROS) Hydro Medusa (the great collection of software libraries and tools for building robot applications) is now available as a Yocto Project layer. ROS has everything from basic drivers to state-of-the-art algorithms, and it’s all open source. ROS Hydro Medusa is the most recent release, and thanks to Gumstix’ support for the Yocto Project, users can get started with ROS quickly and easily. Here’s how to do it!
ARM users, including those in the Gumstix community, can build ROS right into their Yocto Project images using the meta-ros layer. Gumstix also offers ROS binaries ready to be installed on our standard Yocto Project console or desktop images using the built-in Smart package manager for those not interested in building from source. This tutorial covers setting ROS up on a Gumstix computer using both the quick-install method or creating your own embedded Linux with ROS from source.
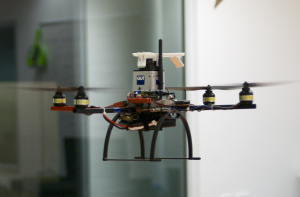
This vertical infrastructure scanner is powered by ROS on a Gumstix. Courtesy of CyPhy Lab at QUT.
Who Is This Tutorial For?
This tutorial is for anyone who wants to run ROS on a Gumstix. A few sample cases come to mind:
- Integrate Gumstix based robots into your existing ROS based research team
- Leverage the extensibility and the power to run Linux on robots such as Gumstix AeroCore
Let’s get started!
Ingredients
We will be using the following hardware and software components in this tutorial:
- meta-ros: BMW Car IT’s meta-ros layer for the Yocto Project makes cross-compiling ROS for ARM devices easier than ever before.
- roscpp_tutorials: The standard implementation of ROS written in C++, roscpp is the most widely used ROS client library. We will be using the roscpp_tutorials package, which shows off the features of ROS step by step, and is a great resource for beginners.
- Gumstix Yocto Project Image: The Yocto Project allows the creation of custom Linux distributions for embedded systems, including Gumstix-based systems. Users create ‘recipes’ for different layers of a distribution, and then BitBake an image.
- Optionally: NooTriX’s Virtual Box image for Ubuntu 12.04 LTS with ROS Hydro Medusa is a platform-independent way to get started with ROS (you will need VirtualBox installed). This will be used as the master node with which Gumstix COMs running ROS can communicate.
- A Gumstix DuoVero or Overo COM and expansion board, or a Pepper single-board computer. We used a DuoVero COM.
Quick Start: Install ROS On A Pre-Built Image
- Get the latest image from Gumstix Getting Started. Either XFCE or the console image will work. These are the direct links for latest master build for DuoVero:
Pepper and Overo users can get the latest factory images at Software Downloads.
- Update update package repository metadata:
$ smart update
- Install ROS packages from the package repository:
$ smart install packagegroup-ros-comm python-wstool python-email python-distutils git git-perltools python-rosinstall rospy-tutorials roscpp-tutorials screen
Advanced: Build ROS From Source
- Add these packages to gumstix-console-image.bb
packagegroup-ros-comm \
python-wstool \
python-email \
python-distutils \
git \
git-perltools \
python-rosinstall \
rospy-tutorials \
roscpp-tutorials \
screen \
- Bitbake the recipe you have just prepared
Get Up and Running
On Your Master Node Machine:
If you opted not to use the virtual machine, you will need to install ROS on your development machine to serve as the master node. This varies depending on your operating system; ROS offers Ubuntu installation instructions.
If you are using the virtual machine, you can skip installing ROS on your development machine.
Run the following commands:
$ roscore
$ rosrun roscpp_tutorials listener
On DuoVero:
- First, bring up the network:
ifup eth0
- Ensure that the hostname of your ROS master node is in the Gumstix machine’s /etc/hosts file. The ROS environment uses hostnames for communications, not IP addresses, so this is a must before proceeding.
- Configure ROS environment variables:
$ export ROS_ROOT=/usr
$ export ROS_MASTER_URI=http://<HOSTNAME>:11311
$ export CMAKE_PREFIX_PATH=/usr
$ touch /usr/.catkin
Where <HOSTNAME> is the hostname of the ROS master node.
- Start a node:
$ roscore
Hello, World!
Next, you’ll want to test that everything is working successfully.
On your Gumstix machine:
root@duovero:~$ rosrun roscpp_tutorials talker
[ INFO] [946685885.327387333]: hello world 0
[ INFO] [946685885.427301895]: hello world 1
[ INFO] [946685885.526972312]: hello world 2
[ INFO] [946685885.626978428]: hello world 3
. . .
[ INFO] [946685887.027186062]: hello world 17
[ INFO] [946685887.127192174]: hello world 18
On the virtual box:
viki@c3po:~$ rosrun roscpp_tutorials listener
[ INFO] [1398449577.583563416]: I heard: [hello world 3]
. . .
[ INFO] [1398449578.986788764]: I heard: [hello world 17]
[ INFO] [1398449579.084779013]: I heard: [hello world 18]
Where to Go From Here?
As we mentioned above, the roscpp_tutorials are a great way to learn more about ROS and how to use it for your projects. Their documentation covers beginner topics, such as writing a simple service and client, to more advanced ones like dynamic reconfiguration.
ROS has many useful packages that can be added to the gumstix-console-image.bb (see the Building ROS From Source section above). We recommend exploring the meta-ros tree to see what packages are available. While the community is working hard to make more ROS packages available everyday, you may not find all the necessary packages ready to go on meta-ros. You can always help out the project by creating a recipe for the package, or send your request over to the repo’s maintainers.
Questions? Let us know in the comments below!
 RSS
RSS