In this Series
- Hardware Setup
- Get an Image
- Create Bootable MicroSD Card
- Boot Your System
You are now ready to boot your Gumstix system for the first time.
Connect Peripherals
- Insert your microSD card into the card slot on top of the COM. Be sure it clicks securely into place.
- Connect any peripherals you wish to use. For most first time users, the following peripherals are highly recommended:
- A powered USB hub on the expansion board's USB Host port or an unpowered USB hub on the expansion board's USB OTG port with a USB On-the-Go cable
- A keyboard via the USB hub
- A mouse via the USB hub
- A LAN connection via the Ethernet port for Internet access
- If supported by your expansion board, a DVI-D capable display via an HDMI to DVI-D cable
- A powered USB hub on the expansion board's USB Host port or an unpowered USB hub on the expansion board's USB OTG port with a USB On-the-Go cable
USB Peripherals and USB Ports
Many Gumstix expansion boards come with both USB Host ports and USB On-the-Go (OTG) ports. The USB Host port is used exlusively for connecting peripherals to the system, while the USB OTG port may be used to either connect peripherals via a USB OTG cable, or to connect the Gumstix system as a peripheral to a separate host.
USB Host ports and USB OTG ports differ in the USB data signaling rates and electrical current they offer:
| USB Host | USB On-the-Go | |
|---|---|---|
| Current (mA) | 500 | 100 |
| Signaling Rate | High-speed (HS) @ 480 Mbit/s |
|
Many USB peripherals use a full-speed (FS) signalling rate, and will not work on the USB Host port, which is high-speed (HS) only. If you are experiencing issues connecting USB peripherals directly to the Gumstix system, connecting peripherals first to a powered USB hub and then connecting the powered hub to the Gumstix system will often solve the problem.
Establishing a Serial Connection via the Console
- Connect your development machine to the expansion board's console port with the appropriate USB cable.
- You will need to determine the device name of the USB serial port using the following command:
$ dmesg | grep tty
Your Gumstix COM should be the last entry. E.g.,
[ 0.000000] console [tty0] enabled [ 0.853593] serial8250: ttyS0 at I/O 0x3f8 (irq = 4) is a 16550A [ 1.047979] 00:09: ttyS0 at I/O 0x3f8 (irq = 4) is a 16550A [ 127.108578] usb 1-1.6: FTDI USB Serial Device converter now attached to ttyUSB0 In this example, the serial connection to our Gumstix COM is on the device /dev/ttyUSB0.
- Use the following command to start a serial connection with your Gumstix COM:
$ sudo screen <USB DEVICE NAME> 115200
Where <USB DEVICE NAME> is the fully qualified path to the device name determined in the last step. E.g.,
$ sudo screen /dev/ttyUSB0 115200
If Screen is not installed, you can install it by typing:
$ sudo apt-get install screen
Boot Your System
- Connect the 5 Volt power supply to your expansion board.
- The LED indicators on the COM should illuminate blue and green. The boot process will display on your development machine's terminal.
- If your expansion board is connected to its own monitor, you will not see the boot process until after the display drivers are loaded at a later stage.
- If the blue and green LEDs on the COM do not illuminate and you see nothing in your terminal, try pressing the reset button on your expansion board until you see a boot process. If the problem persists, the image may not have been flashed successfully. You can try flashing it again, or try using a different image.
- Press any key when prompted to hit any key to stop autoboot.The typical boot process looks similar to the following:
reading u-boot.img
reading u-boot.img


U-Boot 2012.04.01 (Jul 19 2012 - 17:31:34)

OMAP36XX/37XX-GP ES1.2, CPU-OPP2, L3-165MHz, Max CPU Clock 1 Ghz
Gumstix Overo board + LPDDR/NAND
I2C:   ready
DRAM:  512 MiB
NAND:  512 MiB
MMC:   OMAP SD/MMC: 0
In:    serial
Out:   serial
Err:   serial
Board revision: 1
Direct connection on mmc2
timed out in wait_for_pin: I2C_STAT=1000
I2C read: I/O error
Unrecognized expansion board
Die ID #2d3800229ff8000001683b060a00b012
Net:   smc911x-0
Hit any key to stop autoboot:  0
Overo #
- Das U-Boot bootloader comes with a default set of environment variables that may change as new versions are released. Users should clear their current set of environment variables the first time booting with a new version.
Note: This applies to systems with NAND flash only.
-
Environment Variable Commands for Overo COMsAt the U-Boot prompt, type the following commands:
			# nand erase 240000 20000
			# reset
-
Environment Variable Commands for Verdex Pro COMsVerdex Pro users may need to change the U-Boot environment variables to specify that the kernel must be loaded from the microSD card. Use the following commands:
			# mmcinit
			# fatload mmc 0 a2000000 uimage
			# setenv bootargs console=ttyS0,115200n8 root=/dev/mmcblk0p2 rw rootdelay=1
			# saveenv
			Note: users need only add saveenv if they want to save this setup for future boots
			# bootm a2000000
-
- This step is for users of Gumstix LCD panels with Alto, Palo, or Chestnut expansion boards only.To use one of the Gumstix LCD panels, you will need to modify Das U-Boot's default display variable to instruct the kernel to load the corresponding driver with the following steps:
Alto users must be using the custom MLO and U-Boot binaries explained in step two.
- Interrupt the autoboot sequence by pressing any key at the following prompt:
Hit any key to stop autoboot: 5
- Depending on the size of your LCD screen, you will need to type one of the following at the U-Boot prompt:
Screen Size: 4.3" 3.5" Command: setenv defaultdisplay lcd43
setenv defaultdisplay lcd35
- You can save this setting for future boots with the following command:
saveenv
Saving environment variables only works on COMs with NAND flash. On COMs such as the Overo Tide COM and Overo Sand COM, which do not have NAND flash, creating persistent environment variables requires recompiling U-Boot's source code after altering
include/configs/omap3_overo.h. - Finally, instruct U-Boot to continue with the boot process:
boot
- Interrupt the autoboot sequence by pressing any key at the following prompt:
Result
Your COM will now go through the boot process, ending at a Linux login prompt in the terminal similar to the following:
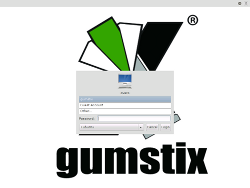
Linaro 12.11 overo tty1
overo login:
Enter the username root at the prompt and press Enter to login. There is no password on newly-flashed images.
For users of expansion boards that support video output: If your expansion board is connected to a monitor and you are using an image with a desktop environment, you will be greeted by a graphical login prompt. The username and password for this login are both gumstix.