
This instruction is written for the stable version of Gumstix Yocto image, Morty. For other version, please contact support@gumstix.com.
Two types of Gumstix Yocto Image
gumstix-console-image
If you're using the Gumstix console image, please follow the steps in this section.
- Open this file with your chosen text editor
/etc/wpa_supplicant/wpa_supplicant-wlan0.conf
- By default, connect to any open network is commented out but if your prefer to use it comment out the WPA2 protected network section and remove the # on the open network section.
# Connect to any open network # network={ # key_mgmt=NONE #} # Connect to a WPA2 protected network network={ ssid="Enter-your-WiFi-name-here" proto=WPA2 key_mgmt=WPA-PSK pairwise=CCMP TKIP group=CCMP TKIP scan_ssid=1 psk="Enter-your-WiFi-password-here" priority=10 } - Restart the wpa_supplicant service. Run:
$ systemctl restart wpa_supplicant@wlan0
gumstix-xfce-image
If you're using the desktop image, please follow the steps in this section.
There are two ways of bringing up WiFi in the desktop image.
Option 1
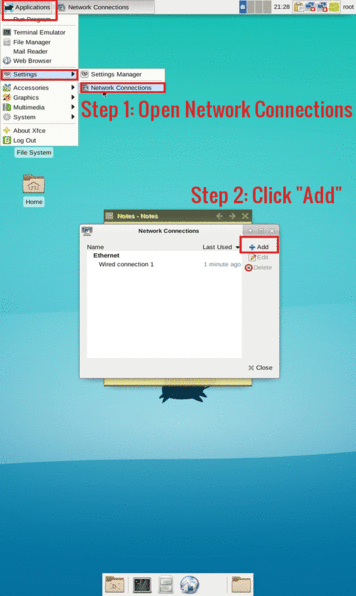
If you have a display (monitor or touchscreen) connected, follow the steps on this image to setup WiFi.
Option 2
Alternatively, you can enable it in console
$ nmcli device wifi connect Your-Network-Name password Your-Network-Password
Note: Be sure to change Your-Network-Name and Your-Network-Password accordingly.
Test WiFi
To verify that you have internet connection via WiFi, run:
$ ifconfig wlan0
You should see the IP address next to "inet addr:". Then, ping an external IP address to test connectivity.
$ ping 8.8.8.8
You should see packages received.