

In this tutorial, learn how to use the iRobot Create 2 to drive around and stream video over the wireless network. We will control the iRobot Create 2 via WiFi from our laptop computer, using a PlayStation controller to steer. Part one covers hardware setup and prerequisites.
Tutorials in this series:
Tutorial 1 (You are here)
Tutorial 2
Tutorial 3
Tutorial 4
Tutorial 5
1.0 Hardware Overview
To build your own teleoperated iRobot Create2 you will need the following hardware:
Using a Gumstix COM (Overo or DuoVero):
- A Gumstix COM (to try it at home, we recommend an Overo AirSTORM-Y)
- A matching expansion board with a USB port (ex: Tobi, Parlor, or AeroCore)
- U.Fl Antenna
- Gumstix iRobot Create 2 cable (note: the cable will also work with an AeroCore 2 + Overo/DuoVero)
- A hi-speed USB hub
- A USB webcam
- Four AA batteries in series to power the COM
- Optional: Sony Dual Shock 3 controller
Using a Pepper SBC (43R or 43C):
- A Pepper 43R or 43C
- U.Fl Antenna
- Gumstix iRobot Create 2 cable (note: the cable will also work with an AeroCore 2 + Overo/DuoVero)
- USB Webcam
- Optional: Sony Dual Shock 3 controller
You can download the source files for this project here.
1.1 Hardware Setup with a Pepper SBC (43R or 43C)
Using a Pepper SBC dramatically reduces the number of parts used, using the Gumstix iRobot Create 2 cable further reduces the bundle of wires. The 3D printed bin is available with the source files here. STL’s for the complete bin as well as a 6-piece variant is available for those with smaller printers.
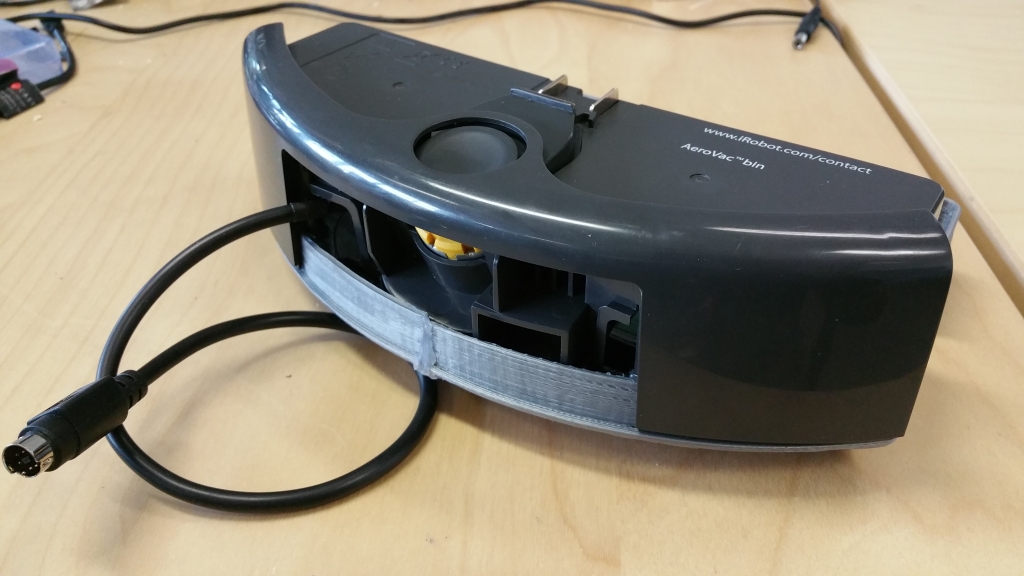
1.1.1 Removed unused components
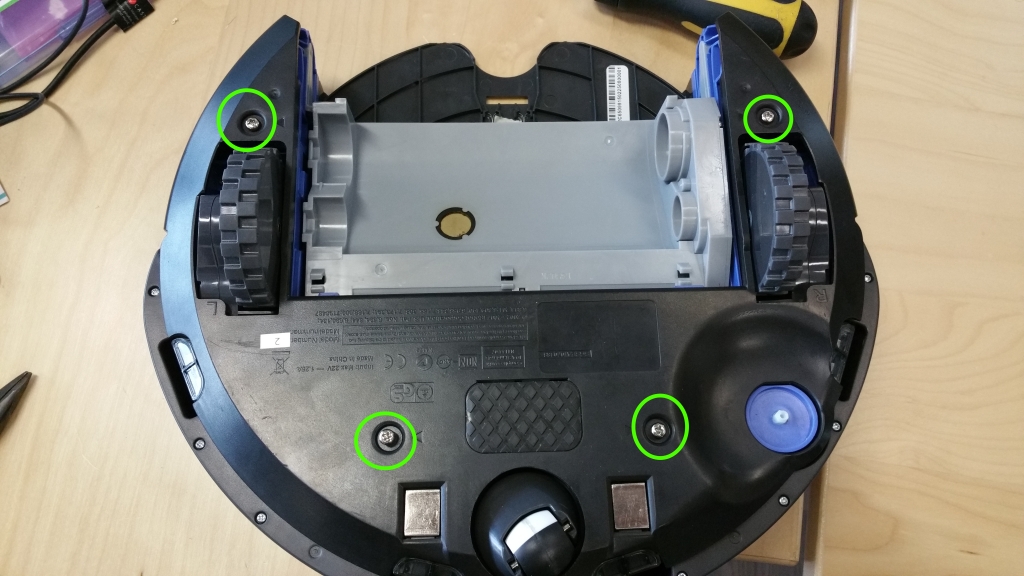
First remove the green faceplate to gain access to the mini-DIN connector. You may use a 1/4″(14mm) drill bit to clear a hole for the connector. Next loosen the 4 screws to the battery cover:
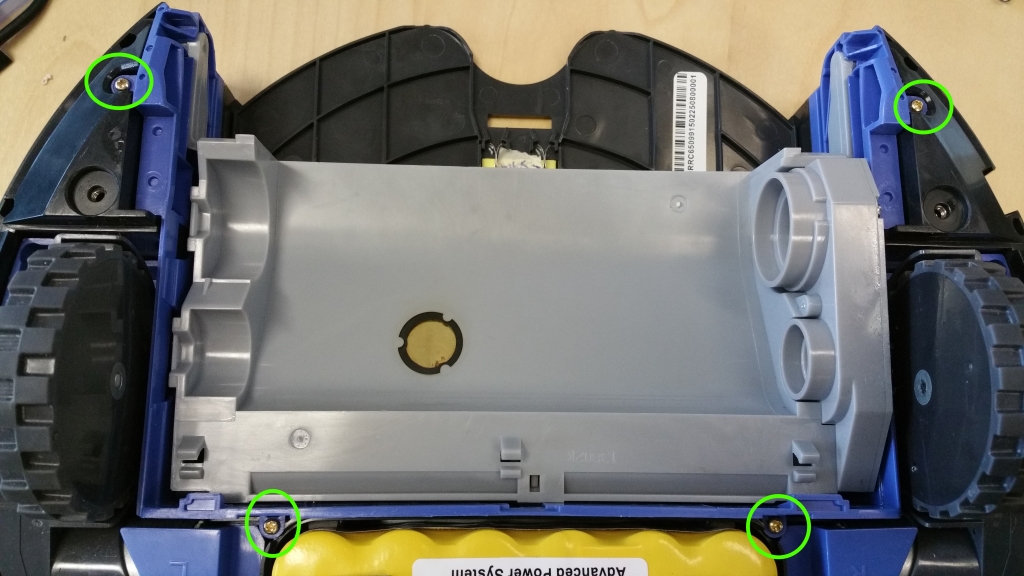
After removing the battery cover, loosen 4 more screws to remove the brush holder:
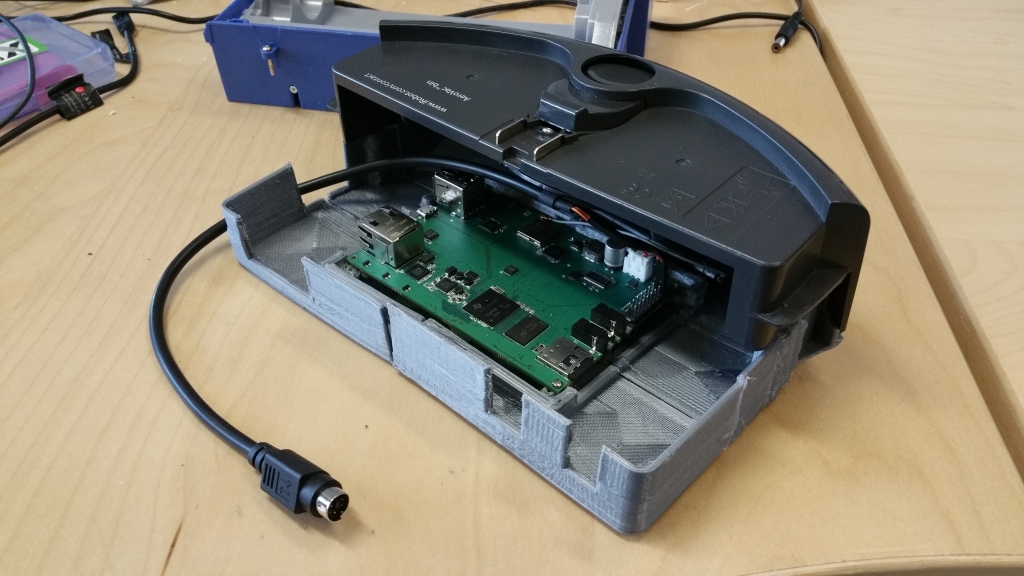
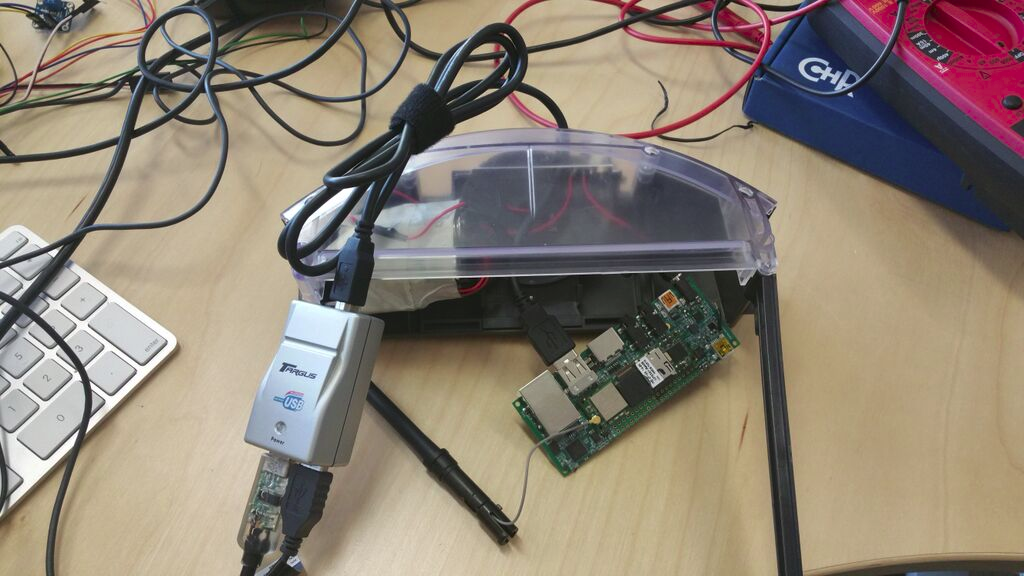
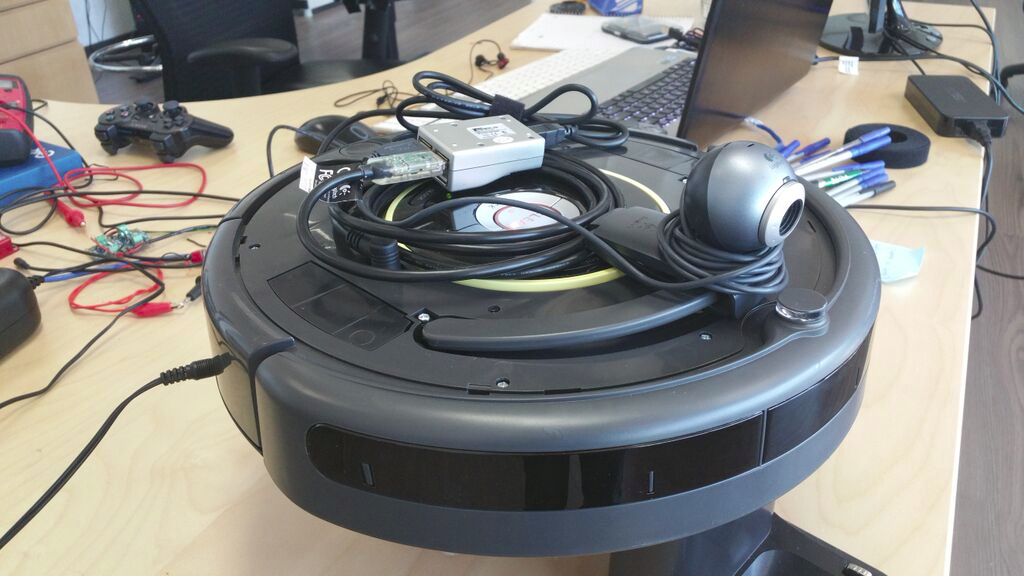
Now you will have room to put your 3D printed bin! Screw the Pepper onto the 3D printed bin, attach the USB webcam to the USB port, and the Gumstix Create 2 Cable as shown:
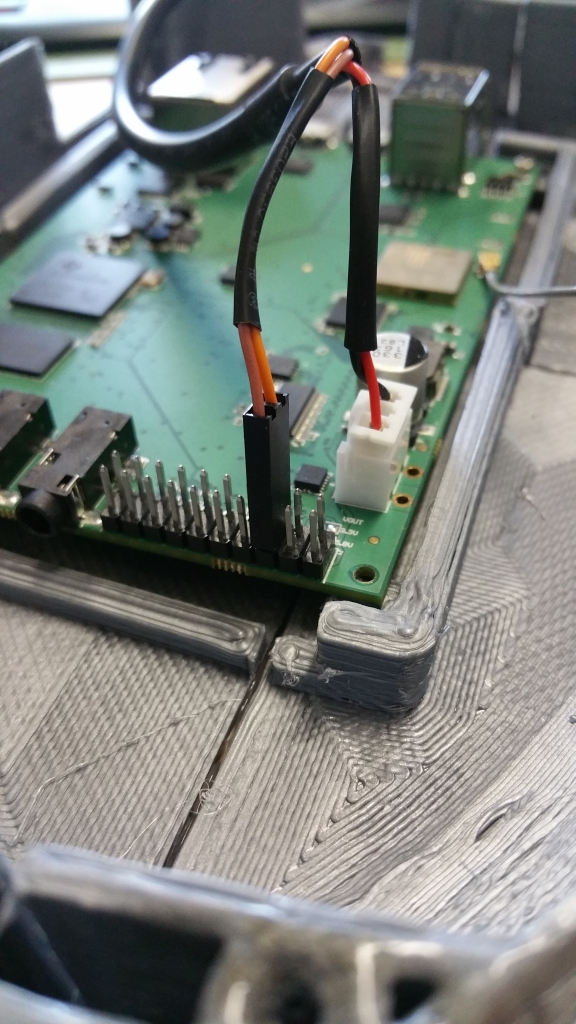
Connect the JST-XH 2S connector to the matching connector on the Pepper, and the UART connector to pin 98(brown) and 97(orange), this is UART2 on the Pepper.
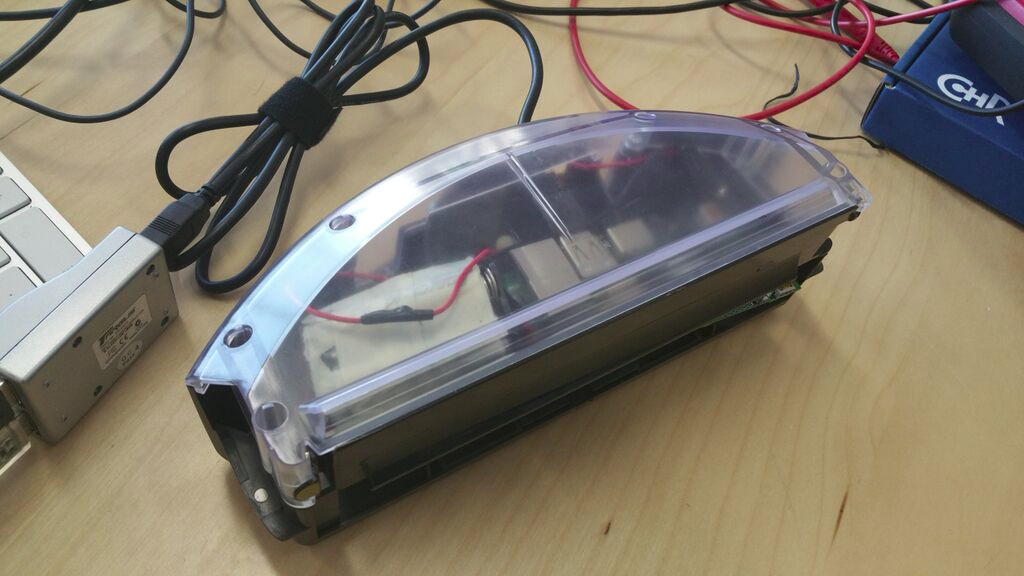
Next, replace the clear bottom piece of the stock dust bin with your new 3D printed bin:
Finally, connect the WiFi antennae and feed the USB webcam cable and mini-DIN cable through where the plastic grille used to be:
And you’re done, move onto section 2.0: Creating a Catkin Workspace!
1.2 Hardware Setup with a Gumstix COM and expansion board
1.2.1 Remove unused components
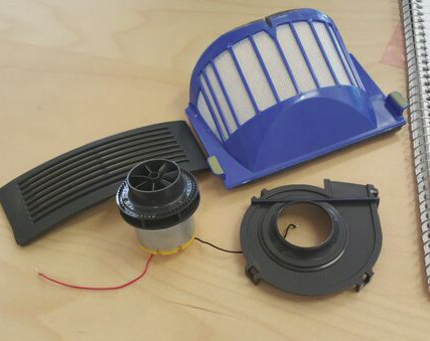
Remove the filter, cover, fan shroud and motor from the bin on the Create 2 to make room for the electronics.
1.2.2 Wire the batteries and add a power connector

Wire four AA batteries in series to power the COM and electronics. You can also solder a switch on the positive wire to make it easier to cut power to the electronics.
1.2.3 Connect the hardware
Connect the wireless antenna to the COM, and then connect the COM to the expansion board. Plug the USB port into the Tobi’s USB Host port before connecting the batteries to the Tobi’s power connector.
1.2.4 Mount the hardware inside the bay
Removing the cover from the bay reveals an opening where you can feed the antenna and USB hub’s cable through, as well as a place to mount the power supply switch if you added one in step 2. The Tobi, COM and batteries can all go inside the bay.
1.2.5 Mount additional hardware on top of the Create 2
Insert the bay back into the Create 2, find somewhere to secure your webcam and you’re set! Make sure your Create 2 is fully charged before teleoperation.
2.0 Create a Catkin Workspace
First, you may need to install Catkin for your version of ROS:
$ sudo apt-get update
$ sudo apt-get install ros-%ROS_DISTRO%-catkin# ex: for ROS Jade
$ sudo apt-get install ros-jade-catkin
Create and initialize a Catkin workspace on your host machine if you don’t already have one. There is an excellent set of tutorials on how to do this at: http://wiki.ros.org/catkin/Tutorials/create_a_workspace.
3.0 Installing ROS Packages on Host
One of the main advantages of ROS is the large collection of open-source packages written and maintained by its community. Learning to install and use these packages can speed up development of your robot considerably.
3.1 Installing gscam from Source
First, install some prerequisites:
$ sudo apt-get install libgstreamer0.10-dev ros-%ROS_DISTRO%-camera-calibration-parsers ros-%ROS_DISTRO%-camera-info-manager libusb-dev libspnav-dev
We will build and install the gscam package from source, as it will be needed later on for streaming video from a USB webcam.
Note: my catkin workspace path is ~/catkin_ws. This was created above following the create a workspace tutorial
Source the following environmental variables:
$ source /opt/ros/%ROS_DISTRO%/setup.bash
$ source ~/catkin_ws/devel/setup.bash
cd to your catkin workspace source directory:
$ cd ~/catkin_ws/src
git clone the source files:
$ git clone https://github.com/ros-drivers/gscam.git
cd to the top of your catkin workspace and build the package:
$ cd ~/catkin_ws
$ catkin_make
Note: catkin_make builds every package under the src directory in the catkin workspace
3.2 Installing Joystick Drivers
In order to use the Playstation controller, we’ll need the joystick drivers package:
$ sudo apt-get install ros-%ROS_DISTRO%-joystick-drivers
# ex: on ROS Indigo
$ sudo apt-get install ros-indigo-joystick-drivers
Next, we will create the iRobotCreate2 package from scratch in part two.
 RSS
RSS